Necessary details:
I use this girls photo, Grunge Brushes, paint splatter from Paint Tossing Pack and space image (you can use space images from our article – 60 unreal space wallpapers from Hubble space telescope).
STEP 1
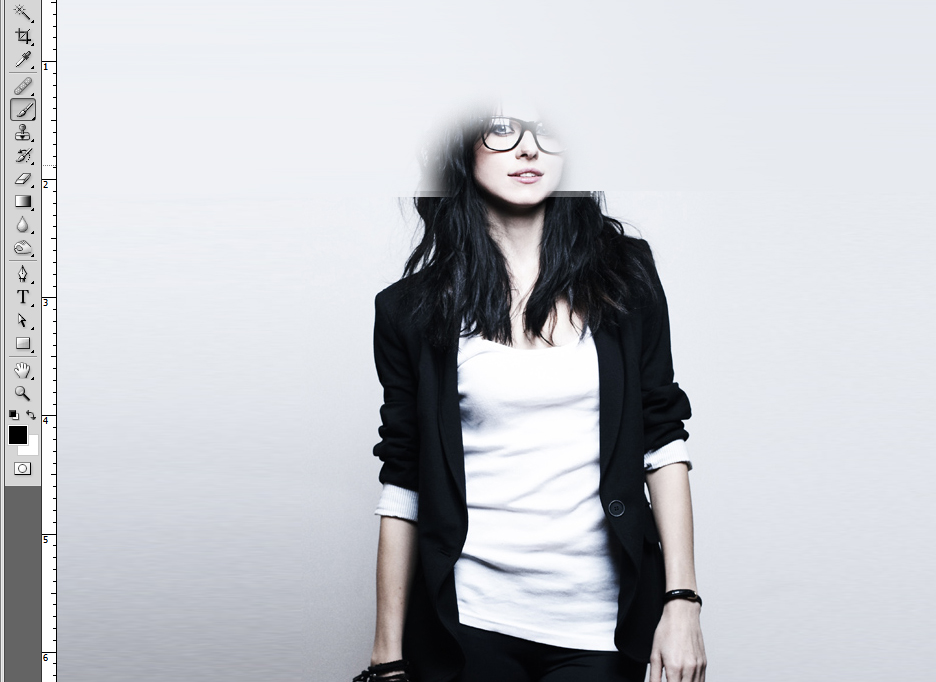
Create new document, size: 1440*900 px, resolution: 300dpi. Open image with your photo. We will use this nice girl photo and drag it to your new document.

 Take Rectangular Marquee Tool (M) and select right side of our image.


Click Ctrl+T, transform this object and pull it till end of image.

Do the same with left side.

Again take Rectangular Marquee Tool (M) and select top right corner.

Copy this selection (Edit – Copy) and paste it (Edit – Paste). Now stretch out it. Do the same with left side
STEP 2
Merge those both top layers: select layers and Layer – Merge Layers. Now you need make homogeneous layer color. Do that with Motion Blur filter (Filer – Blur – Motion blur).


Add layer mask to this layer.

Select brush tool and with black color draw circle around girl face, so we delete greay color from girl face.
Now merge this layer with girl layer: Layer – Merge Layers.
As you can see, background color is little bit dissimilar.

STEP 3
To fix it, we will use Clone Stamp Tool. Click Alt + left mouse click on some part of background and now easy remove all roughness.

Now select Lasso Tool with Feather 50px and select approximate girls contour.

Invert selection (Ctrl+I) or Select – Inverse. To inverted selection add Gaussian Blur with radius 5,3 px.

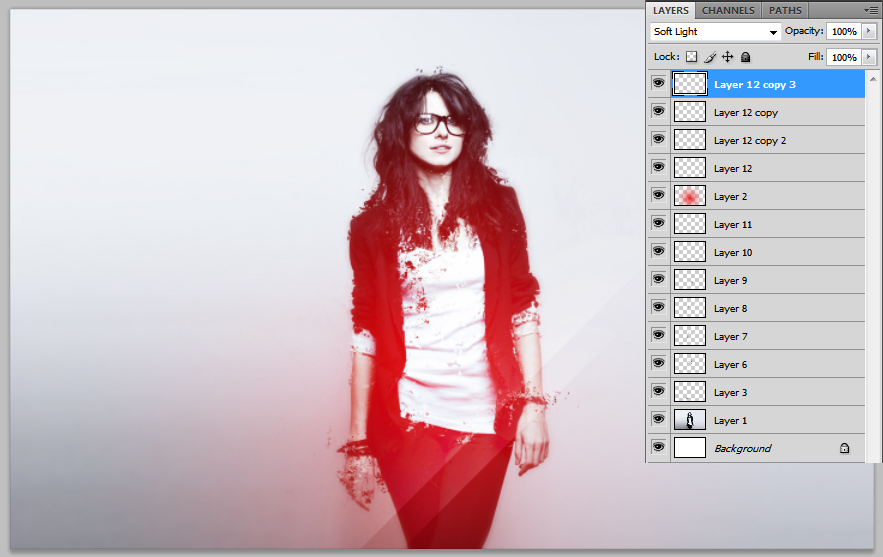
Create new layer. Take Gradient Tool, click on Radial Gradient and select Foreground to Transparent.

Change foreground color to red #ea0011 and draw paint spot.


Blending mode change to Lighten.

STEP 4
Now we will collapse our girl. For that we need use Grunge Brushes.

Take Clone Stamp Tool and select grunge brushes. And now with free movements copy different parts of girl body. I recommend do that on new layer.
Here is result:
Here is result:

Now we will create light lines. At first create new layer. Take Rectangular Marquee Tool and select some area. Take Gradient Tool, Radial Gradient with Foreground to Transparent. Select Foreground white and draw half of light spot.

Now to this layer add Motion Blur filter:

Copy this light spot layer, transform it and change blending mode to Soft Light. Duplicate both lights spots layers.
STEP 6
Now we will need paint splatters. We will use paint splatter from Paint Tossing Pack.Open image with paint tossing and with Magic Wand Tool select background.

Pull this paint tossing to our image. Decolor it: Image – Adjustments – Desaturate. Reduce paint tossing size. Now we will add some brightness: Image – Adjustments – Brightness/Contrast. Erase unnecessary paint splashes.

Retouch little bit splashes: Edit – Transform – Warp and change splashes form.


Create new layer. Name it Girl and merge all layers throw Image – Apply Image.

Create one more new layer. Select Line Tool and draw 15 similar lines.
Rotate lines to 45 angle and move to girls hand.

Go to Select – Load Selection.
Delete layer with lines and with remaining selection copy this portion of the layer Girl and insert in to new layer. Few Move over, pulled out of the boundaries of girls body. Superfluous details wipe with eraser.

Add a few geometric shapes. Using standard tools: Rectangle Tool, Polygon Tool. I used color #fbd500 and #e30014, the opacity for each figure – 20%. Then I group them in the group Geometry.

Then I added the glow around the girl, for that use photo from space.

After you add space image, change blending mode to Screen.The remaining sharp boundaries simply erase with eraser

Create a triangular selection on a layer of Girl with Polygonal Lasso Tool. Immediately copy and paste as a new layer and transform it – turning and increase in size.

Apply Gaussian Blur, with a radius of 3px. Layer mode reserve Normal, and the opacity set to 20%. Now duplicate this layer and change the blend mode to Overlay with opacity of 80%. Combines them in a group Triangle and choose an arbitrary position. I set the opacity to 70%.


0 comments:
Post a Comment